
A complete guide to all 11 bosses in Chapter 1, including the secret bosses most players miss.
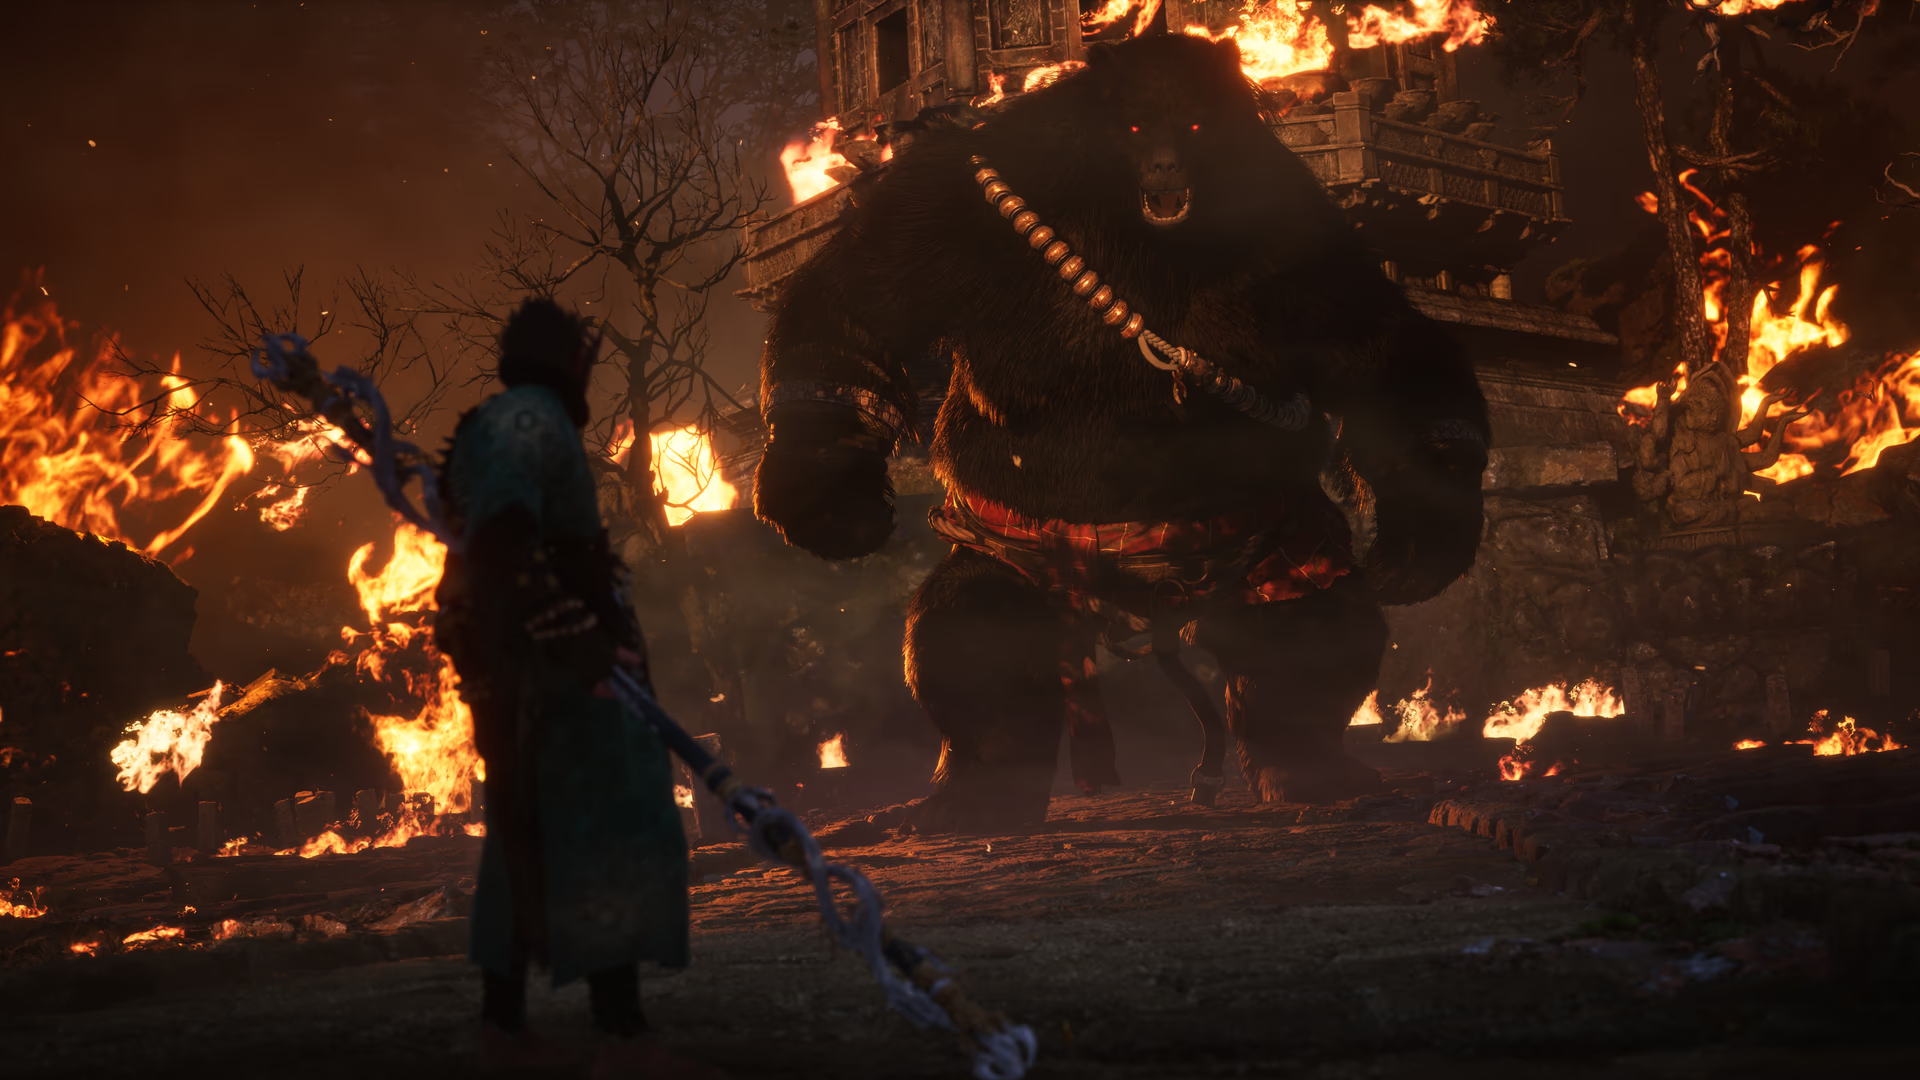
[IMAGE: Black Bear Guai at Bodhi Peak — the Chapter 1 final boss surrounded by fire, claws raised]
Chapter 1 of Black Myth: Wukong contains 11 bosses across Black Wind Mountain — seven required for story completion and four optional, two of which are secret. The optional bosses aren't just side content: their Spirits and rewards directly change how the mandatory fights play out, particularly the Whiteclad Noble and the final boss Black Bear Guai.
This guide covers every boss in the order you'll encounter them, with the exact location, what it drops, and how to beat it.
A quick expectation-setter: most of Chapter 1 is deliberately forgiving — it's teaching you the game. Two fights are the exception. Wandering Wight and Whiteclad Noble are the difficulty spikes players consistently get stuck on, and it's normal to need several attempts at both. If you're breezing through everything else and suddenly hit a wall, you're not doing anything wrong — that's just where the chapter decides to test you.
Looking for the full Chapter 1 walkthrough? See our Black Myth: Wukong Chapter 1 walkthrough for the complete path through Black Wind Mountain.
All Chapter 1 Bosses at a Glance
Boss | Type | Required? | Region |
|---|---|---|---|
Yaoguai Chief | Yes | Forest of Wolves: Front Hills | |
Yaoguai Chief | No ⚠️ Missable | Forest of Wolves: Outside the Forest | |
Yaoguai Chief | Yes | Forest of Wolves: Outside the Forest | |
Yaoguai King | Yes | Forest of Wolves: Guanyin Temple | |
Yaoguai Chief | No | Bamboo Grove: Snake Trail | |
Yaoguai Chief | Yes | Bamboo Grove: Snake Trail | |
Character Boss | Yes | Bamboo Grove: Marsh of White Mist | |
Yaoguai King | No — Secret ⚠️ | Ancient Guanyin Temple: Grand Chamber | |
Yaoguai King | Yes | Black Wind Cave: Cave Interior | |
Yaoguai King | Yes — Final Boss | Black Wind Cave: Bodhi Peak | |
Yaoguai King | No — Secret 🔒 Ch2 | Forest of Wolves: Outside the Forest |
⚠️ Wandering Wight is permanently missable — he disappears after Elder Jinchi is defeated. Fight him before ringing the third bell. 🔒 Red Loong requires the Loong Scale from Chapter 2 to access.
Bullguard
[IMAGE: Bullguard in his arena — large frame, halberd raised, the cave gate visible behind him]
No. | 1 |
Boss Name | Bullguard |
Type | Yaoguai Chief |
Location | Forest of Wolves / Front Hills |
Required | Yes |
Rewards | Immobilize spell (auto-granted mid-fight), Will |
Bullguard is the first boss in the game and functions as a controlled introduction to the core combat loop. Every attack he throws is slow, deliberate, and heavily telegraphed. Dodge sideways on each swing — not backwards, which keeps you too far away to punish — and hit him during recovery.
At exactly 50% health, a cutscene pauses the fight and grants you the Immobilize spell automatically. When control returns, cast it immediately: freeze him, build Focus with light attacks, then release a fully charged heavy. That's the fight.
The one thing to watch: his Leaping Slam carries him forward fast. Sprint sideways away from the landing zone and punish from the side during recovery.
Wandering Wight *(Optional — Missable)*
[IMAGE: Wandering Wight patrolling the forest clearing — turquoise colour, oversized stone head, trees behind him]
No. | 2 |
Boss Name | Wandering Wight |
Type | Yaoguai Chief |
Location | Forest of Wolves / Outside the Forest |
Required | No — Missable ⚠️ |
Rewards | Wandering Wight Spirit, Cat Eye Beads Curio, Will |
⚠️ Fight him before ringing all three bells. Wandering Wight permanently disappears once Elder Jinchi is defeated. He respawns in New Game+, but you won't get his Spirit during a first playthrough if you skip him.
The Wandering Wight Spirit is one of the strongest in Chapter 1 and directly impacts the Whiteclad Noble and Black Bear Guai fights. Don't skip this fight.
He hits hard but moves slowly. Everything he does telegraphs early — watch for the arm raise before ground slams and dodge sideways. Keep lock-on active and attack during recovery. Immobilize extends your damage windows cleanly.
The one thing to watch: don't stand directly behind him during recovery. His stumble animation has a rear hitbox that catches players who think they're safe.
If the game tells you "Cannot absorb Spirits without guidance" after the fight, don't worry — his Spirit is stored and available at any Keeper's Shrine once you receive the Blessed Gourd from Yuan Shoucheng at Snake Trail.
Guangzhi *(Required)*
[IMAGE: Guangzhi mid-combat — flame glaive raised, embers rising, torch-lit gate in the background]
No. | 3 |
Boss Name | Guangzhi |
Type | Yaoguai Chief |
Location | Forest of Wolves / Outside the Forest |
Required | Yes |
Rewards | Red Tides Transformation spell, Will |
Guangzhi is significantly faster than Bullguard and has shorter recovery windows. The key adjustment is not manually charging heavy attacks here — his speed punishes the charge animation. Build Focus through light combos and release only after a confirmed opening.
His Boomerang Glaive Throw is the attack that catches most players. He winds back and hurls the flame glaive — it travels out and returns, hitting on both passes. One dodge is not enough. Sidestep the outgoing throw, then immediately sidestep again for the return.
His clearest damage window is the Fire AoE channel: he plants his glaive in the ground and stands completely still while charging the explosion. Cast Immobilize during the channel and land a full charged heavy before the burst fires.
Defeating Guangzhi unlocks the Red Tides Transformation — the ability to become Guangzhi and deal heavy fire damage. It's one of the most useful tools for the rest of Chapter 1.
⚠️ Before leaving the arena, turn around. Bell #1 is at the treeline directly behind you. Ring it before going anywhere. See our three bell locations guide if you need help finding all three.
Lingxuzi *(Required)*
[IMAGE: Lingxuzi dropping from the Guanyin Temple rooftop — grey wolf form mid-lunge, red eyes, courtyard visible below]
No. | 4 |
Boss Name | Lingxuzi |
Type | Yaoguai King |
Location | Forest of Wolves / Guanyin Temple |
Required | Yes |
Rewards | Grey Wolf Mask, Mind Core, Stone Spirit, Yarn ×3, Will |
Lingxuzi drops from the temple rooftop and opens with a leaping double slash — watch for him tapping his left arm on the ground just before the leap. That's the tell.
His most deceptive attack is the stationary wide swipe: a slow, deliberate wind-up with a long arm-back pause before the release. New players dodge on the wind-up and walk directly into the swing. Wait for the arm to actually release before committing. Dodge sideways, not backwards.
He also has an Uppercut Slash followed by a Ground Punch combo that happens at mid-range. When he backs up, pauses, and looks at you while positioning sideways — create distance immediately. That's the tell for that combo. If it lands, it takes significant health.
When he perches on the rooftop mid-fight, stay still. Dodge only at the precise moment he begins his aerial dive — early dodges will reset positioning and leave you where he lands.
Red Tides from Guangzhi is highly effective here. Activate the transformation and attack with charged heavies during his recovery windows. Pillar Stance is also strong in this fight for avoiding his ground-based sweeps.
After the fight, check the left side at the top of the temple stairs — there's a pot containing a Celestial Jade Lotus Pill that permanently increases maximum HP. Easy to miss.
Baw-Li-Guhh-Lang *(Optional)*
[IMAGE: Baw-Li-Guhh-Lang at the river clearing — colossal toad, smaller Croaky frogs visible in the surrounding water]
No. | 5 |
Boss Name | Baw-Li-Guhh-Lang |
Type | Yaoguai Chief |
Location | Bamboo Grove / Snake Trail |
Required | No |
Rewards | Baw-Li-Guhh-Lang Spirit, Tadpole (upgrade material), Yarn ×2, Will |
Clear the Croaky frogs around the arena before starting. If even one is left alive, it will interrupt the fight at the worst moment.
Baw-Li-Guhh-Lang is the most forgiving optional boss in Chapter 1. His attacks deal modest damage and most have visible wind-ups. The tongue lash is the one that surprises people — it has significantly more range than the animation suggests. Dodge backwards when he opens his mouth.
His weak point is the head — attack from the front when possible. Immobilize and Red Tides both apply cleanly. His Spirit, which lets you use a tongue lash attack, is worth picking up for the Whiteclad Noble fight.
Guangmou *(Required)*
[IMAGE: Guangmou hovering in his arena — poison orbs swirling around him, bamboo torch pathway leading to the entrance]
No. | 6 |
Boss Name | Guangmou |
Type | Yaoguai Chief |
Location | Bamboo Grove / Snake Trail |
Required | Yes |
Rewards | Guangmou Spirit, Blood of the Iron Bull, Stone Spirit, Will |
Guangmou is a ranged-focused boss that constantly repositions via teleport. The instinct is to chase him — resist it. Instead, hold position at mid-range and let him come back to you. He always reappears within engagement distance after teleporting.
Kill the snakes immediately when they appear. Guangmou summons poisonous snakes from the ground during the fight, and they apply poison on hit. Letting them accumulate means taking persistent damage while you're trying to focus on him. Switch lock-on to the snakes and clear them before resuming pressure.
If you've already defeated Wandering Wight, his Spirit's headbutt attack is particularly useful here — it knocks Guangmou down and prevents him from teleporting away, giving you a clean window to close the distance and land a full combo.
Poison resistance from early-game consumables helps here. Immobilize is effective right after he teleports and settles. Red Tides deals significant fire damage — activating it during this fight also triggers unique in-game dialogue between Guangzhi's spirit and Guangmou that's worth hearing.
The Guangmou Spirit he drops — which summons two poisonous snakes — is worth equipping before Black Bear Guai. It can apply poison from the start of that fight before the bear has time to attack.
Ring Bell #2 after the fight. Head up the small staircase directly behind Guangmou's arena. Ring it before heading to the Marsh of White Mist shrine.
Whiteclad Noble *(Required)*
[IMAGE: Whiteclad Noble Phase 1 — white-robed figure with spear raised, standing in the shallow marsh]
[IMAGE: Whiteclad Noble Phase 2 — full serpentine form, water erupting from the arena floor]
No. | 7 |
Boss Name | Whiteclad Noble |
Type | Character Boss |
Location | Bamboo Grove / Marsh of White Mist |
Required | Yes |
Rewards | Jade Fang (crafting material for Twin Serpent's Staff), Stone Spirit, Will |
The Whiteclad Noble is the hardest required fight in Chapter 1 and the first boss with two full health bars and two completely different forms. The second phase health bar resets completely when Phase 1 ends.
Phase 1 — Spear Form
His spear combo chains quickly and ends with a delayed thrust — dodge each hit in the chain individually and wait for the thrust before committing to a punish. His Spear Throw travels out and returns to him, hitting both ways — one dodge is not enough. The Water Arc Sweep generates a shockwave that can be jumped over.
The reliable Phase 1 opener is: Immobilize → Wandering Wight Spirit → Red Tides in quick sequence. This combination, landed before he reacts, removes a substantial chunk of Phase 1 health. Finish Phase 1 with Pillar Stance charged heavies during recovery windows.
Phase 2 — Serpentine Form
He transforms and the health bar resets. Phase 2 is faster and adds diagonal water waves, a Slithering Rush charge, and a wide 180° Tail Sweep you can jump over. The rush is linear — sidestep. The water waves move diagonally across the arena — position between them.
The same fundamentals apply: dodge each hit individually, wait for confirmed openings, don't get greedy. Phase 2 punishes overextension more severely than Phase 1. Save at least one Immobilize and one Spirit activation for Phase 2 — that's when burst damage matters most.
After the fight, go left instead of following the main path.
⚠️ Bell #3 is to the left of this arena, through the flooded ravine. Defeat the wolves and ring it — this triggers transport to the Ancient Guanyin Temple. See our three bell locations guide for the exact path.
Elder Jinchi *(Optional — Secret)*
[IMAGE: Elder Jinchi in the Grand Chamber — large-headed robed figure, monk corpses scattered around the temple floor]
No. | 8 |
Boss Name | Elder Jinchi |
Type | Yaoguai King |
Location | Ancient Guanyin Temple / Grand Chamber |
Required | No — Secret ⚠️ |
Rewards | Will ×2,000 + Fireproof Mantle Vessel (collected from wolf corpse next to Bell #3 after the fight) |
How to unlock: Ring Bell #1 (behind Guangzhi's arena), Bell #2 (up the stairs from Guangmou's arena), Bell #3 (left of Whiteclad Noble's arena through the flooded ravine). Ringing the third bell teleports you directly to the Ancient Guanyin Temple.
Elder Jinchi fights like a stronger version of the Wandering Wight — identical core moveset, but longer combos, more health, and harder hits. The fight is manageable until he floats.
When Elder Jinchi rises into the air, stop attacking him immediately. He's absorbing nearby monk corpses to heal himself. Sprint to the corpses and kill as many as possible before they reach him. Each one absorbed is real health recovered. He can also cause golden-glowing minions to rush at you and detonate — sprint away from them and they won't reach you.
Outside absorption phases: dodge slams sideways, punish recovery, use Immobilize for extended damage windows. The Wandering Wight Spirit is effective here — appropriate given the story connection between the two characters.
After the fight, a cutscene plays and you're returned to Bell #3's location.
⚠️ Look at the tree next to Bell #3 immediately after returning. A wolf corpse hangs from a branch — interact with it to collect the Fireproof Mantle Vessel. This item grants fire damage resistance and complete Scorch immunity. It makes Black Bear Guai's fire phase significantly more manageable and is permanently missable if you don't pick it up here.
Black Wind King *(Required)*
[IMAGE: Black Wind King in the temple arena — humanoid spear fighter, black wind energy swirling around him]
No. | 9 |
Boss Name | Black Wind King |
Type | Yaoguai King |
Location | Black Wind Cave / Cave Interior |
Required | Yes |
Rewards | Cloud Step spell (auto-granted after fight), Will |
The Black Wind King is the fastest, most aggressive boss in Chapter 1 up to this point. He chains rapid spear combos with minimal recovery between hits, and his signature ability — the Black Wind Orb charge — catches most players off guard.
The Black Wind Orb: he dissolves into a wind orb and charges through your position, then immediately reverses direction and charges back. The return pass is where nearly every death happens. Dodge through the first charge, then dodge sideways for the return. The timing on the return is fixed — once the first charge lands, the return comes quickly.
His spear combo can chain up to six hits. Count the hits rather than guessing when he stops. Panicking and spending all stamina early means you get caught by the final swing with nothing left to dodge.
Immobilize works cleanly once he settles after a teleport or charge sequence. Red Tides deals solid damage during recovery windows. If you've invested in Pillar Stance parrying, this fight rewards it more than any previous one.
Watch for his healing attempt — he occasionally raises his gourd to drink from it and recover health. This is your cue to rush in and interrupt with aggression immediately; don't stand back and let it complete.
After the fight, loot the temple before leaving: there's an Agate Jar Curio in a small chest by the courtyard and an Awaken Wine Worm in a glowing barrel on the right. Cloud Step is granted automatically after the fight — you'll use it constantly from here on.
Black Bear Guai *(Required — Final Boss)*
[IMAGE: Black Bear Guai Phase 1 at Bodhi Peak — massive black bear against the burning mountain, claws raised]
[IMAGE: Black Bear Guai Phase 2 — fire pillars erupting across the arena floor, smoke filling the air]
No. | 10 |
Boss Name | Black Bear Guai |
Type | Yaoguai King |
Location | Black Wind Cave / Bodhi Peak |
Required | Yes — Final Boss |
Rewards | Craving Eyes Relic, Flame Ebongold, Yaoguai Core, Stone Spirit, Mind Core, Silk ×2, Yarn ×5, Will |
Before entering: Equip the Fireproof Mantle Vessel. Slot the Wandering Wight Spirit and Guangmou Spirit. Craft the best available weapons and armor at the Bodhi Peak shrine. If you have Spark points to spend, prioritize Robust Constitution (max HP) and any points still owed to Immobilize's duration or cooldown — both pay off directly in this fight's longer engagement windows.
Black Bear Guai is the true form of the Black Wind King. Everything you learned in that fight — the wind orb charges, the recovery windows, the timing — carries directly into this one. The mechanics are the same. The scale is not.
Phase 1 — Bear Form
His claw combos chain quickly for a boss his size. The Overhead Paw Slam has the most generous punish window in Phase 1 — dodge sideways and attack during the recovery. His Belly Flop from range has little visual warning; sprint sideways when you see him lower his body.
Most importantly: the Black Wind Orb charge works identically to the Black Wind King's. He dissolves, charges through you, reverses, charges back. Dodge through the first pass, dodge sideways for the return. The timing is the same. The only difference is the arena is larger, which gives you more room to work with.
Open the fight with Guangmou Spirit — the two poisonous snakes it summons will apply poison before Black Bear Guai has time to attack. Follow immediately with Immobilize and a charged heavy while he's frozen.
Phase 2 — Fire Bear
At around 50% health, fire pillars begin erupting from the arena floor in fixed zones. Activate the Fireproof Mantle immediately. It grants complete Scorch immunity and removes the persistent chip damage from the burning zones that would otherwise drain your health while you're trying to focus on his attacks.
Phase 2 adds a Fire Breath sweep — sprint perpendicular to the direction he's breathing, not backwards. Fire-charged claw combos move faster than Phase 1 versions. Same dodge direction, less margin.
Save the Wandering Wight Spirit for Phase 2 — that's when the burst damage matters most and when his speed makes consistent punish windows harder to create. Cloud Step lets you reposition cleanly when the arena becomes too chaotic.
After the fight, you receive the Craving Eyes Relic and a choice of passive perk:
Opportune Watcher — significantly increases Focus gained from consecutive light attacks (best for Smash Stance builds)
Eagle Eye — reduces Unveiling Strike cooldown after successful hits (best for spell-focused play)
Keen Insight — significantly increases Critical Hit Damage (best for crit builds)
You don't need to choose immediately. Chapter 2 begins right after.
Red Loong *(Optional — Chapter 2 Return)*
[IMAGE: The waterfall near Outside the Forest shrine — Buddha statue to one side, sealed entrance at the base]
No. | 11 |
Boss Name | Red Loong |
Type | Yaoguai King |
Location | Forest of Wolves / Outside the Forest |
Required | No — Secret 🔒 Ch2 |
Access | Requires Loong Scale from Chapter 2 |
Rewards | Loong Pearl, Thunder Tail, Boshan Censer Curio |
Red Loong is the secret dragon boss of Chapter 1 and cannot be reached on a first pass. The waterfall entrance is sealed until you obtain the Loong Scale from Chapter 2 — found by breaking a hidden wall in the First Prince of the Flowing Sands arena using the Wandering Wight Spirit or Azure Dust, then opening the chest inside.
Once you have the Scale, fast travel back to Outside the Forest Shrine, interact with the waterfall, and the hidden arena opens.
Red Loong is tuned for Chapter 2 stats and significantly harder than anything else in Black Wind Mountain. Don't attempt it at Chapter 1 gear levels. His lightning-based attacks hit hard and cover large areas — target the vessels on his back when he stumbles to deal amplified damage.
All Chapter 1 Rewards Summary
Boss | Key Rewards |
|---|---|
Bullguard | Immobilize spell |
Wandering Wight | Wandering Wight Spirit · Cat Eye Beads |
Guangzhi | Red Tides Transformation spell |
Lingxuzi | Grey Wolf Mask · Mind Core · Stone Spirit · Yarn ×3 |
Baw-Li-Guhh-Lang | Baw-Li-Guhh-Lang Spirit · Tadpole · Yarn ×2 |
Guangmou | Guangmou Spirit · Blood of the Iron Bull · Stone Spirit |
Whiteclad Noble | Jade Fang (crafts Twin Serpent's Staff) · Stone Spirit |
Elder Jinchi | Will ×2,000 · Fireproof Mantle Vessel (from wolf corpse after fight) |
Black Wind King | Cloud Step spell |
Black Bear Guai | Craving Eyes Relic · Flame Ebongold · Yaoguai Core · Stone Spirit · Mind Core · Silk ×2 · Yarn ×5 |
Red Loong | Loong Pearl · Thunder Tail · Boshan Censer |
For the full path through Chapter 1, see our Chapter 1 walkthrough. For help finding the three bells that unlock Elder Jinchi, see our three bell locations guide.